Apache cheatsheet for CentOS8
1 What version of Apache?
If Apache is already installed and running, check version with:
httpd -v
You can cross-check that on CentOS8 using dnf:
dnf info httpd
2 Installing Apache on CentOS8
Apache is part of the default CentOS repositories. The Apache package is is called httpd. Here are the steps I took to install it on a CentOS 8 minimal Linux VM:
sudo dnf list | grep httpdsudo systemctl | grep -i httpdsudo dnf install httpdsudo systemctl status httpdsudo systemctl eneable httpdsudo systemctl start httpdsudo systemctl status httpd
2.0.1 Upgrade:
sudo systemctl stop httpd- backup all config files:
# it is one of these files:
  /etc/apache2/httpd.conf
  /etc/apache2/apache2.conf
  /etc/httpd/httpd.conf  # this one
  /etc/httpd/conf/httpd.conf

# the do the backup
sudo cp /etc/httpd/conf.d/*.conf ~/httpd-backup
sudo cp /etc/httpd/conf/httpd.conf ~/httpd-backup/httpd.conf
sudo cp /etc/httpd/conf/ssl.conf ~/httpd-backup/ssl.conf
- sudo
dnf install httpd --upgradeis NOT the way to do it. To update Apache in CentOS, we have to fully install the latest version of httpd (Apache server) sudo systemctl start httpd(or sudo service httpd start on other Linux distribution)
2.1 firewalld
centos expects firewalld to be running. i turned off firewalld in favour of the traditional iptables. therefore the following apache firewall steps did nothing:
- sudo firewall-cmd –permanent –zone=public –add-service=http
- sudo firewall-cmd –permanent –zone=public –add-service=https
- sudo firewall-cmd –reload
instead I added these iptable forward rules:
0 log        tcp  --              192.168.111.11       tcp dpt:80 log flags 0 level 6 prefix " f o r w a r d http --> vm1"
0 accept     tcp  --              192.168.111.11       tcp dpt:80 /* forward web to vm1 */
along with these prerouting rules:
log    tcp  --  ens33  *  0.0.0.0/0   0.0.0.0/0   tcp dpt:80 log flags 0 level 6 prefix " . . d n a t  web pkt to vm1 "
dnat   tcp  --  ens33  *  0.0.0.0/0   0.0.0.0/0   tcp dpt:80 /* translate web destination to vm1 */ to:192.168.111.11
2.2 apache2 config files on Centos8
Other distributions might install in /etc/apache2 but Centos installs in:
/etc/httpd/conf/httpd.confand/etc/httpd/conf.d/php.confand others like welcome.conf autoindex.conf etc.
In fact, you can change this behaviour by looking for the ServerRoot line
in httpd.conf. In my case I left it as "/etc//httpd"
2.3 apache documentroot
documentroot is an environment variable set within apache config file that
specifies the root of the web server. all web files served by this apache
server see this directory as the root directory:
by default it is /var/www/html or /var/www
this can be changed with by changing documentroot in the config file:
/etc/httpd/conf/httpd.conf
if it is not listed there, you simply add the line:
documentroot /var/www/newdocumentroot
2.4 apache serverroot
top of the tree under which apaches config, error, and log files are kept.
see /etc/httpd/conf/httpd.conf
2.5 files
/var/log/httpd/var/lib/httpd# contains the httpd state/etc/httpd/conf/httpd.conf# the main config file!/etc/httpd/conf/magic# contains the mime types supported/etc/httpd/conf.d/php.conf/etc/httpd/conf.d/welcome.conf/etc/httpd/conf.d/userdir.conf/etc/httpd/conf.d/autoindex.conf
see man 5 httpd.conf which states that the main config file for apache is:
/etc/httpd/conf/httpd.conf
2.6 other possible config files:
2.6.1 specifiying documentroot in httpd.conf
I would check
/etc/apache3/httpd.conf/etc/apache2/apache2.conf/etc/httpd/httpd.conf/etc/htpd/conf/httpd.conf
on my centos system it was in:
-/etc/httpd
specifically
-/etc/httpd/
3 installing php on the host with apache
sudo dnf list --installed | grep -i phpsudo dnf info phpsudo dnf upgrade php (or install php)
4 starting / stopping apache ( for systemd )
Not sure where it would be "apache" but for CentOS servers it is "httpd".
systemctl restart apachesystemctl start apachesystemctl stop apachesystemctl enable apachesystemctl disable apache
5 Securing apache.
Most of this was gleaned from this youtube link.
5.1 Keep apache up-to-date
dnf upgrade httpd
5.2 Securing apache and wordpress users
Each of these daemons should be run by a least privileged user, and NOT run
by root.
- Make the user have
nologinshell. Here are a few lines of/etc/passwdwhere you can see that these users have least privileges.zintis:x:1000:1000::/home/zintis:/bin/bash apache:x:48:48:Apache:/usr/share/httpd:/sbin/nologin mysql:x:27:27:MySQL Server:/var/lib/mysql:/sbin/nologin nginx:x:992:989:Nginx web server:/var/lib/nginx:/sbin/nologin
To change a user to use /sbin/nologin use the command:
chsh /sbin/nologin apache
OR
usermod -s /sbin/nologin apache
- Ensure all the files in
/var/wwware owned byapachewith groupapache:cd /var/www ; chown apache:apache *
- change the home directory of each user. So for apache -> /var/www/html
sudo vipwand change the home directory to/var/www/html- or,
usermod -m -d /var/www/html apache-dis an abbreviation for--homeand changes the user's home directory
Typically you would run these commands as a common sequence:
mkdir /home/new_home_directorychown username:username /home/new_home_directorychmod 700 /home/new_home_directoryusermod --home /home/new_home_directory username
5.3 Securing httpd.conf lines
You can change global directory security settings, or override these global
settings for a particular directory with the AllowOverride yes Otherwise
just the global settings will take effect.
Starting from DocumentRoot "/var/www/html"
<Directory>
Require ip 77.68.0.0/16 127.0.0.1/32
Require ip 2001:db8::a00:20ff:fea7:ccea
Require ip 2001:db8:1:1::a
Require ip 2001:db8:2:1::/64
Require ip 2001:db8:3::/48
</Directory>
6 Installing wordpress
This was giving me grief, as I had set up mysql, and php and apache as I thought I should, but when opening a web page to /var/www/html with: http://zintis.net I got the error "Error Establishing a Database Connection"
These are things I checked or changed to fix this:
- investigate
selinux, setsebool and getseboolAs per youtube link on installing wordpress on Centos8, I added these two comands to permit apache user to read and write files in/var/www/htmlsemanage fcontext -a -t httpd_sys_rw_content_t "/var/www/wordpress(/.*)?"followed by:semanage fcontext -l | grep httpd_sys_rw_content_t| grep "\/var\/www\/wordpress"
6.0.1 fix file access
This should get you a line (among others) that is:
/var/www/html(/.*)? all files system_u:object_r:httpd_sys_rw_content_t:s0where the right section means that:- the process httpd has read/write permissions inside the directories specifed i.e /var/www/html
6.0.2 fix network access.
I had to tell semange to also allow the process access out the network, so that
it is able to download and use plugins that are in the cloud. So, do this:
setsebool -P httpd_can_network_connect on
Then I confirmed that change with getsebool -a | grep httpd_can_network_connect
like this:
root@zinux /var/www/html[1014]$
getsebool -a |  grep httpd_can_network
httpd_can_network_connect --> off
httpd_can_network_connect_cobbler --> off
httpd_can_network_connect_db --> off
httpd_can_network_memcache --> off
httpd_can_network_relay --> off
root@zinux /var/www/html[1015]$
setsebool -P httpd_can_network_connect on
root@zinux /var/www/html[1016]$
getsebool -a |  grep httpd_can_network
httpd_can_network_connect --> on
httpd_can_network_connect_cobbler --> off
httpd_can_network_connect_db --> off
httpd_can_network_memcache --> off
httpd_can_network_relay --> off
root@zinux /var/www/html[1017]$
6.1 Fix that worked.
Seems like my database had privileges but not to the correct database or to the correct host.
GRANT ALL PRIVILEGES ON wordpress.* TO "wordpress"@"zintis.net"
    -> IDENTIFIED BY "###yoursecretpass######";
That was part of it. The other was properly editing wp-config.php
// ** MySQL settings - You can get this info from your web host ** //
/** The name of the database for WordPress */
define( 'DB_NAME', 'wordpress' );

/** MySQL database username */
define( 'DB_USER', 'wordpress' );

/** MySQL database password */
define( 'DB_PASSWORD', '###yoursecrretpass######' );

/** MySQL hostname */
/** define( 'DB_HOST', 'localhost' ); */
define( 'DB_HOST', 'zintis.net' );
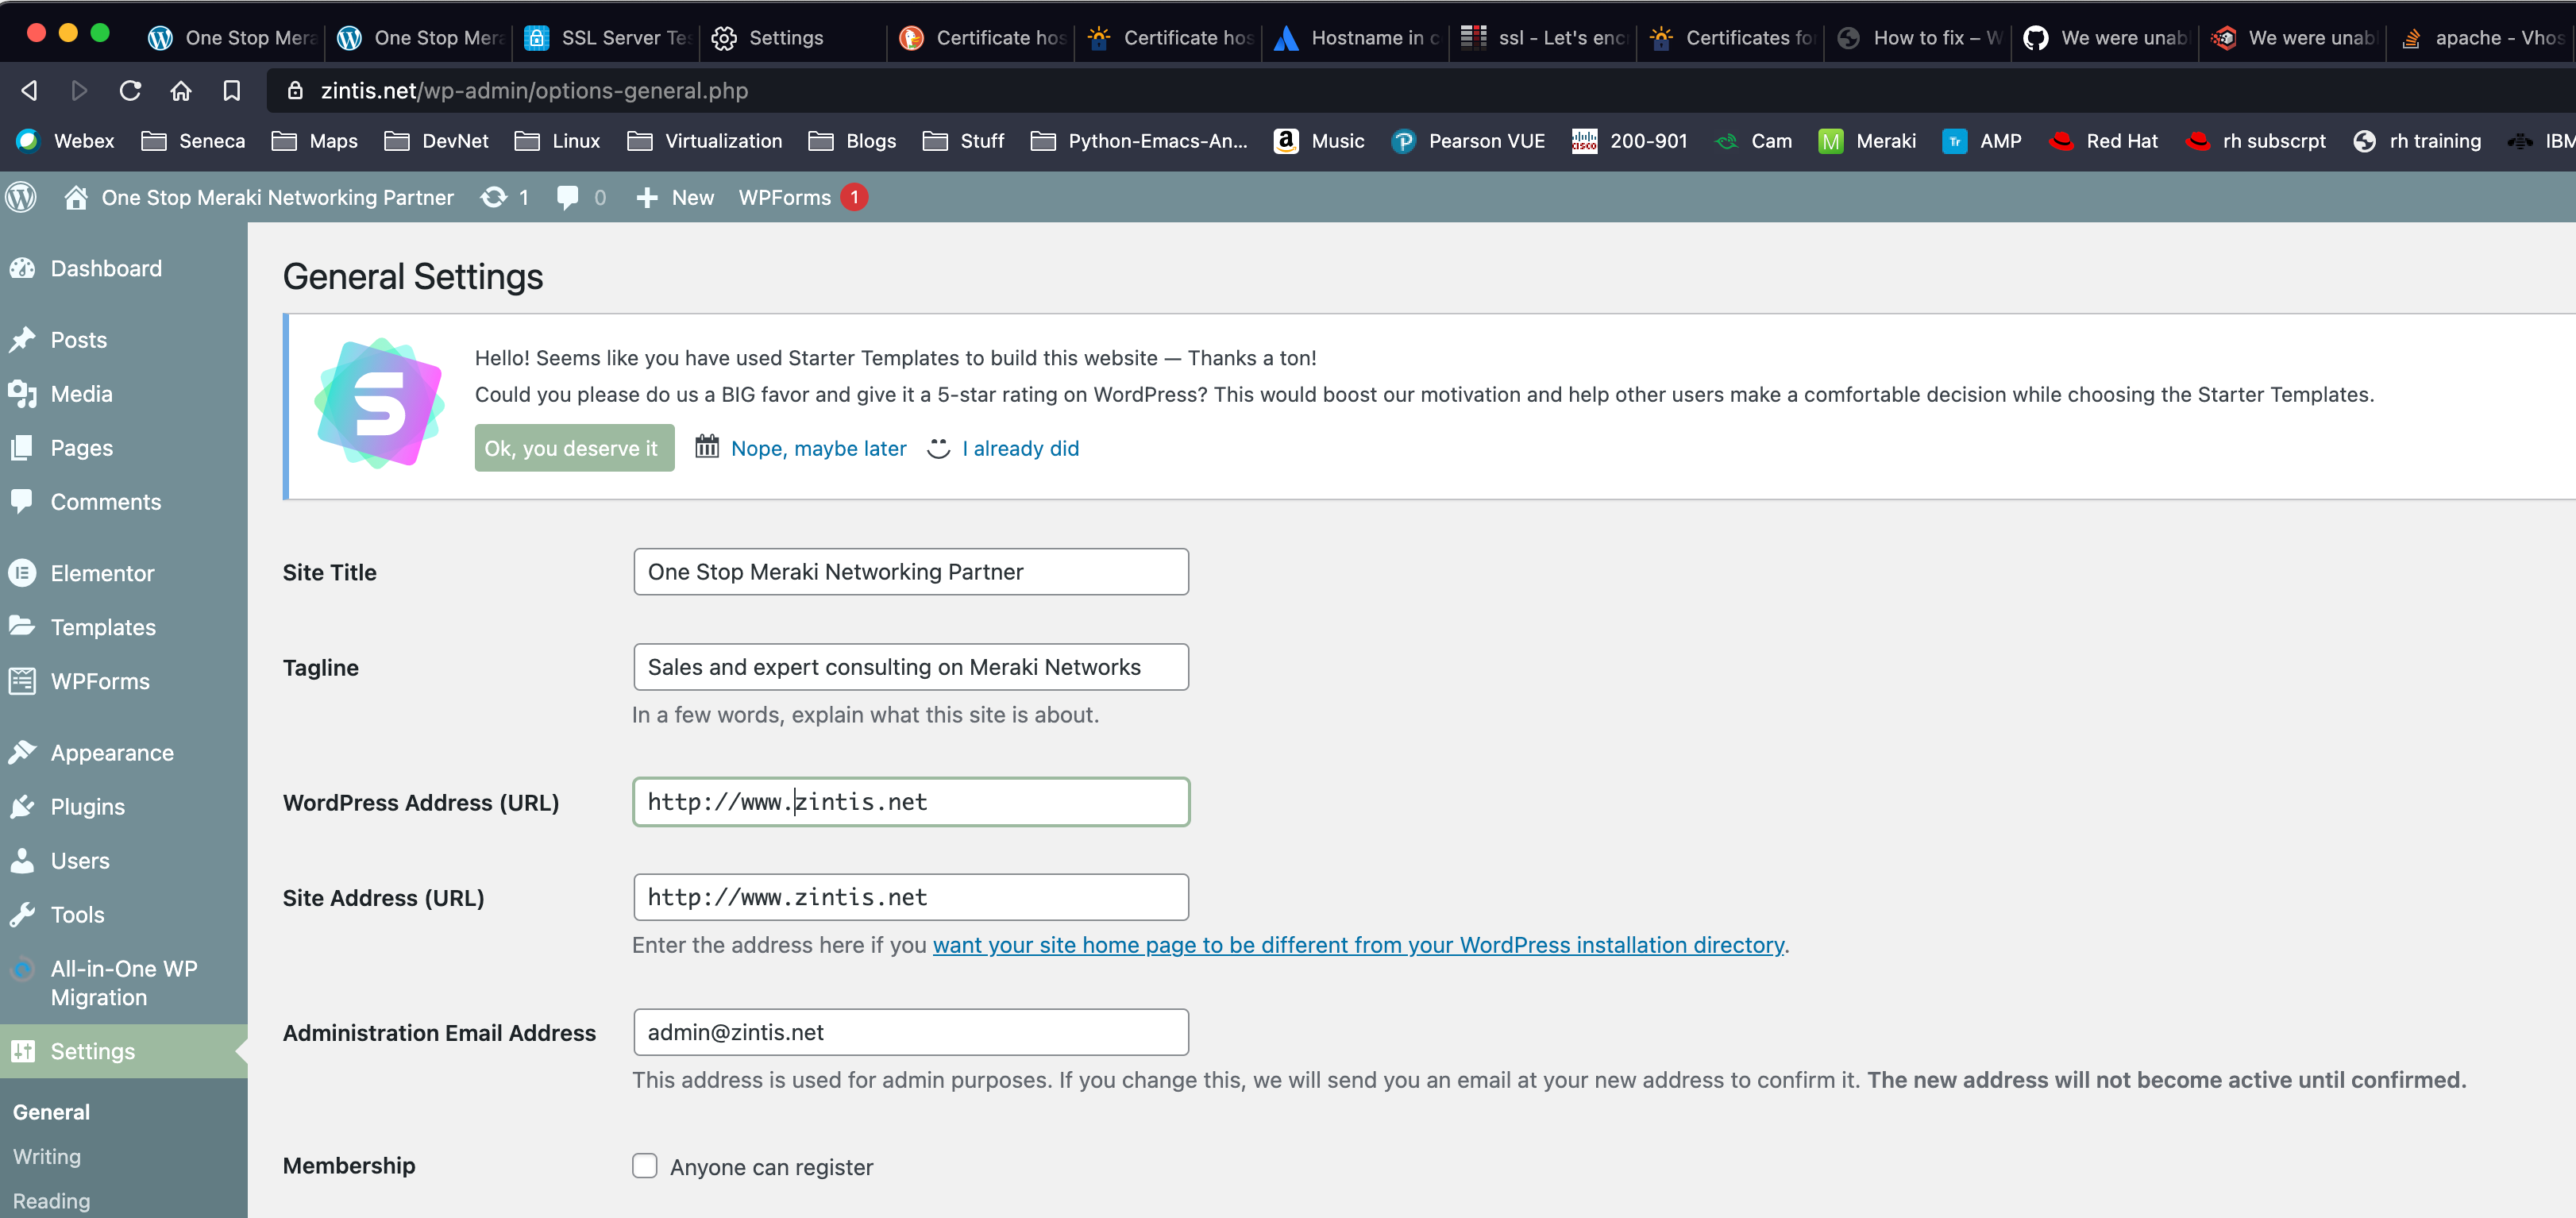
6.2 wordpress admin URL
The admin site is: zintis.net/wp-admin/ username and password are what you
set them when installing wordpress.
7 Wordpress Vulnerabilities Scan, wpscan
wpscan --url zintis.net --api-token xLBReBlUMH3fsOHWGuawNfnQZe77qj6EU0pLgM7SAwg
In order to scan for vulnerabilities, WPSCAN website offers a free API token. To retrieve the token:
Once you have the token, save it somewhere safe, then use it whenever you
perform a scan by including the option --api-token so like this:
wpscan --url zintis.net --api-token xLBReBlUMH3fsOHWGuawNfnQZe77qj6EU0pLgM7SAwg
The free version of the API token allows one to perform 50 vulnerability scans per day.
7.1 Upgrading wpscan
I installed wpscan using brew, so: brew install wpscan Well actually I
tried that unsuccessfully. What did work was this:
- curl -fsSL https://raw.githubusercontent.com/Homebrew/install/HEAD/install.sh > wpscan-install.sh
- chmod 740 wpscan-install.sh
- mv wpscan-install.sh ~/bin
- less ~/bin/wpscan-install
- ~/bin/wpscan-install.sh
- brew install wpscanteam/tap/wpscan * actually I do not remember if I did this step or not…, but I did run brew upgrade wpscan after this point.
I got a message: Warning: wpscanteam/tap/wpscan 3.8.15 already installed
8 phpmyadmin
Setting password for the wordpress user gave me this:
UPDATE `wp_users` SET `user_pass` = MD5('v@rdusp13dien$') WHERE `wp_users`.`ID` = 1;
9 Uninstalling wordpress:
- Delete the wordpress database:
- login to mysql:
mysql -u root -p SHOW databases;DROP DATABASE wordpress;SHOW databases;
- login to mysql:
10 installing modssl to enable https: encryption~
a very good, easy to follow, website is linuxconfig.org
First, some file locations where these certificates and public / private
keys are kept are in /etc/ssl/certs and in /etc/ssl/private which can
be symlinks to /etc/pki/tls/certs
This is a summary:
- Install modssl module using dnf
dnf install mod_ssl - Enable it
(really just restart httpd)
To test if it is enabled:
apachectl -M | grep sslIf not enabled, (no output)
systemctl restart httpdShould now seessl_module (shared)when grepping apachectl. - Open TCP port 443 to allow incoming https traffic.
Using iptables:
Using firewall:
firewall-cmd --zone=public --permanent --add-service-https
firewall-cmd --reload
- Generate a SSL certificate (if not already done so)
Also:
openssl req -key domain.key -new -out domain.csropenssl req -newkey rsa:2048 -nodes -keyout domain.key -out domain.csr
This will generate a private key AND a csr for that private key. The
public key is not yet there. (do a list and you will see that it is not there).
You can then later generate the public key with:
openssl -out zintis.net.pub.keythere is more to this….
If you do the 2-step approach, you first gernerate a key pair:
openssl genpkey -out zintis.net.key 2048
Notice that at this point there is ONLY the private key here.
Generate the public key with:
openssl rsa -in zintis.net.key -pubout -out zintis.net.pub
Now you will have both the private and public keys.
Finally, generate a Certificate Signing Request, CSR.
openssl req -new -key zintis.net.key -out zintis.net.csrAnswer the questions, as shown below:
# openssl req -newkey rsa:2048 -nodes
      -keyout /etc/pki/tls/private/httpd.key
      -x509
      -days 365
      -out /etc/pki/tls/certs/httpd.crt
(all on one line)

Generating a RSA private key
................+++++
..........+++++
writing new private key to '/etc/pki/tls/private/httpd.key'
-----
You are about to be asked to enter information that will be incorporated
into your certificate request.
What you are about to enter is what is called a Distinguished Name or a DN.
There are quite a few fields but you can leave some blank
For some fields there will be a default value,
If you enter '.', the field will be left blank.
-----
Country Name (2 letter code) [XX]:ca
State or Province Name (full name) []:ontario
Locality Name (eg, city) [Default City]:toronto
Organization Name (eg, company) [Default Company Ltd]:zintis.ops
Organizational Unit Name (eg, section) []:ops335
Common Name (eg, your name or your server's hostname) []:vm1
Email Address []:zintis@zintis.ops
Finally, test that your csr looks good with:
openssl req -text -in zintis.net.csr -noout -verify
10.0.1 From Seneca's course lab notes:
openssl genrsa -des3 -out vm2.andrewsmith.ops.key 2048chmod 600 vm2.andrewsmith.ops.keyopenssl req -new -key vm2.andrewsmith.ops.key -out vm2.andrewsmith.ops.csropenssl x509 -req -days 365 -in vm2.andrewsmith.ops.csr -signkey vm2.andrewsmith.ops.key -out vm2.andrewsmith.ops.crtopenssl rsa -in vm2.andrewsmith.ops.key -out vm2.andrewsmith.ops.key.nopassmv vm2.andrewsmith.ops.key.nopass vm2.andrewsmith.ops.keyopenssl req -new -x509 -extensions v3_ca -keyout cakey.pem -out cacert.pem -days 3650chmod 600 vm2.andrewsmith.ops.key cakey.pemcp vm2.andrewsmith.ops.key cakey.pem /etc/ssl/privatecp vm2.andrewsmith.ops.crt cacert.pem /etc/ssl/certs
10.1 Install the certificates to apache's config file
/etc/httpd/conf/httpd.conf
Actually be careful here , as there are several places where the certificates could be referenced. To find out run the following:=
grep -i -r "SSLCertificate" /etc/httpdgrep -i -r "SSLCertificate" /etc/httpd
root@vm1/etc/httpd[1017]$
grep -i -r "SSLCertificate" /etc/httpd
/etc/httpd/conf.d/ssl.conf.holding:#   Point SSLCertificateFile at a PEM encoded certificate.  If
/etc/httpd/conf.d/ssl.conf.holding:# SSLCertificateFile /etc/pki/tls/certs/localhost.crt
/etc/httpd/conf.d/ssl.conf.holding:# SSLCertificateFile /etc/ssl/certs/vm2.zintis.ops.crt
/etc/httpd/conf.d/ssl.conf.holding:# SSLCertificateKeyFile /etc/pki/tls/private/localhost.key
/etc/httpd/conf.d/ssl.conf.holding:# SSLCertificateKeyFile /etc/ssl/private/vm2.zintis.ops.key
/etc/httpd/conf.d/ssl.conf.holding:#   Point SSLCertificateChainFile at a file containing the
/etc/httpd/conf.d/ssl.conf.holding:#   the referenced file can be the same as SSLCertificateFile
/etc/httpd/conf.d/ssl.conf.holding:# SSLCertificateChainFile /etc/pki/tls/certs/server-chain.crt
/etc/httpd/conf.d/ssl.conf:#   Point SSLCertificateFile at a PEM encoded certificate.  If
/etc/httpd/conf.d/ssl.conf:SSLCertificateFile /etc/pki/tls/certs/localhost.crt
/etc/httpd/conf.d/ssl.conf:SSLCertificateKeyFile /etc/pki/tls/private/localhost.key
/etc/httpd/conf.d/ssl.conf:#   Point SSLCertificateChainFile at a file containing the
/etc/httpd/conf.d/ssl.conf:#   the referenced file can be the same as SSLCertificateFile
/etc/httpd/conf.d/ssl.conf:#SSLCertificateChainFile /etc/pki/tls/certs/server-chain.crt
/etc/httpd/conf/httpd.conf:SSLCertificateFile "/etc/ssl/certs/vm1.zintis.ops.crt"
root@vm1/etc/httpd[1018]$
11 Google Workspace admin page
12 Setting up google workspace as email for zintis.net on linode.
GoDaddy: Protect your domain Make sure no one else can use your domain with Google Workspace Why do I need to do this? We don't want someone else to use your domain to sign up for Google Workspace. You can help us keep your domain safe by showing us that you are the owner.
How this works Every domain (like your-company.com) has a set of DNS records that can be viewed by anyone on the internet. DNS records tell computers how to find your website and where to deliver your company's email messages.
You'll copy a verification code from the Google Workspace setup tool. You'll sign in to your domain registrar and paste the verification code in to the DNS records for your domain. Once your domain registrar publishes your verification code, we'll know you are the owner of your domain. I'm an advanced user–give me some technical details
12.1 How it works:
You're about to add a TXT record to the DNS settings at your domain registrar. This is the easiest method for most new Google Workspace administrators.
If you prefer a different verification method, you can also use the setup tool to:
add a CNAME record at your domain registrar. This is similar to the TXT verification method described below. get an HTML file with your verification code. You can upload that file to your website, and we'll confirm your domain ownership when we see the file on your site. get your verification code in the form of an HTML meta tag. You can add that meta tag to your website's home page, and we'll confirm your domain ownership when we see the tag in your home page's HTML code. If your domain doesn't have MX records for an existing email provider, you might be able to use an MX record to confirm your domain ownership. Note: The setup tool only offers this option if it determines your domain is eligible for this verification method. To use one of these other verification methods, click Switch verification methods when you open the setup tool.
13 Linode SSL certificates
From this linode community posting:
"While Linode is not a Certificate Authority and doesn't offer SSLs for purchasing, you can use any 3rd party SSL certificate on a Linode server.
You can install an SSL on many different Linux configurations. Here are a few guides for the most popular distributions and web servers:
CentOS:SSL Certificates with Apache on CentOS 7
Ubuntu: SSL Certificates with Apache on Debian & Ubuntu
Each web server (Apache, Nginx) will need to be configured to work with your third-party certificates, depending on your websites and requirements.
One of the easiest methods for obtaining and installing an SSL certificate is
through Let's Encrypt. The Electronic Frontier Foundation (EFF) has developed
Certbot, a free and automated tool for creating Let's Encrypt SSLs and
configuring them for different web server software. /Certbot runs on your
Linode and can be downloaded on Certbot's website.

14 Log of letsencrpyt.org and certbot
Here is the final output of my certbot --apache command:
certbot --apache
Saving debug log to /var/log/letsencrypt/letsencrypt.log
Plugins selected: Authenticator apache, Installer apache

Which names would you like to activate HTTPS for?
- - - - - - - - - - - - - - - - - - - - - - - - - - - - - - - - - - - - - - - -
1: www.zintis.net
2: zinux.zintis.net
- - - - - - - - - - - - - - - - - - - - - - - - - - - - - - - - - - - - - - - -
Select the appropriate numbers separated by commas and/or spaces, or leave input
blank to select all options shown (Enter 'c' to cancel): 1
Cert not yet due for renewal

You have an existing certificate that has exactly the same domains or certificate name you requested and isn't close to expiry.
(ref: /etc/letsencrypt/renewal/www.zintis.net.conf)

What would you like to do?
- - - - - - - - - - - - - - - - - - - - - - - - - - - - - - - - - - - - - - - -
1: Attempt to reinstall this existing certificate
2: Renew & replace the certificate (may be subject to CA rate limits)
- - - - - - - - - - - - - - - - - - - - - - - - - - - - - - - - - - - - - - - -
Select the appropriate number [1-2] then [enter] (press 'c' to cancel): 1
Keeping the existing certificate
Created an SSL vhost at /etc/httpd/conf.d/wordpress-le-ssl.conf
Deploying Certificate to VirtualHost /etc/httpd/conf.d/wordpress-le-ssl.conf
Redirecting vhost in /etc/httpd/conf.d/wordpress.conf to ssl vhost in /etc/httpd/conf.d/wordpress-le-ssl.conf

- - - - - - - - - - - - - - - - - - - - - - - - - - - - - - - - - - - - - - - -
Congratulations! You have successfully enabled https://www.zintis.net
- - - - - - - - - - - - - - - - - - - - - - - - - - - - - - - - - - - - - - - -
Subscribe to the EFF mailing list (email: admin@zintis.net).

IMPORTANT NOTES:
 - If you like Certbot, please consider supporting our work by:

   Donating to ISRG / Let's Encrypt:   https://letsencrypt.org/donate
   Donating to EFF:                    https://eff.org/donate-le

root@zinux ~[1037]$
14.1 root "history" of letsencrpt CA install
Run April 23, 2021 Key to this process are the snap install commands, and the certbot –apache command. See certbot.eff.org/docs
dnf install snapd
iptables -L
iptables -S
iptables -A INPUT -p tcp -m tcp --dport 80 -j LOG --log-prefix " Remote web " --log-level 6
iptables -A INPUT -p tcp -m tcp --dport 80 -j ACCEPT
iptables -A INPUT -p tcp -m tcp --dport 443 -j LOG --log-prefix " Remote https " --log-level 6
iptables -A INPUT -p tcp -m tcp --dport 443 -j ACCEPT
systemctl enable --now snapd.socket
systemctl start snapd
snap install core
snap refresh core
dnf list --installed | grep certbot
dnf remove certbot
lst /var/lib/snapd/
ln -s /var/lib/snapd/snap /snap
snap install --classic certbot
ln -s /snap/bin/certbot /usr/bin/certbot
dnf install mod_ssl
which ssl_module
ssr httpd
apachectl -M | grep ssl
certbot --apache
Then you can check if your auto-renew is set up correctly. I found that crontab -l had zero entries, so I looked further with:
systemctl list-timerssystemctl list-timers NEXT LEFT LAST PASSED UNIT ACTIVATES Fri 2021-04-23 11:40:00 EDT 6min left Fri 2021-04-23 11:30:04 EDT 3min 37s ago sysstat-collect.timer sysstat-collect.service Fri 2021-04-23 12:22:15 EDT 48min left Fri 2021-04-23 11:22:14 EDT 11min ago dnf-makecache.timer dnf-makecache.service Fri 2021-04-23 16:23:55 EDT 4h 50min left Thu 2021-04-22 16:23:55 EDT 19h ago systemd-tmpfiles-clean.timer systemd-tmpfiles-clean.s> Fri 2021-04-23 19:01:00 EDT 7h left n/a n/a snap.certbot.renew.timer snap.certbot.renew.servi> Sat 2021-04-24 00:00:00 EDT 12h left Fri 2021-04-23 00:00:00 EDT 11h ago unbound-anchor.timer unbound-anchor.service Sat 2021-04-24 00:07:00 EDT 12h left Fri 2021-04-23 00:07:00 EDT 11h ago sysstat-summary.timer sysstat-summary.service Sat 2021-04-24 06:18:24 EDT 18h left Fri 2021-04-23 06:17:02 EDT 5h 16min ago dnf-automatic.timer dnf-automatic.service 7 timers listed. Pass --all to see loaded but inactive timers, too. root@zinux ~[1003]$
Of note is the snap.certbot.renew.timer line. So looks good.
14.2 Monitoring certbot installation
The obvious one is looking at what certificates you have instaslled:
certbot certificatescertbot certificates Saving debug log to /var/log/letsencrypt/letsencrypt.log - - - - - - - - - - - - - - - - - - - - - - - - - - - - - - - - - - - - - - - - Found the following certs: Certificate Name: www.zintis.net Serial Number: 381beada275ecacc9cb450278104dcacb28 Key Type: RSA Domains: www.zintis.net Expiry Date: 2021-07-22 14:05:28+00:00 (VALID: 89 days) Certificate Path: /etc/letsencrypt/live/www.zintis.net/fullchain.pem Private Key Path: /etc/letsencrypt/live/www.zintis.net/privkey.pem - - - - - - - - - - - - - - - - - - - - - - - - - - - - - - - - - - - - - - - - root@zinux /etc/letsencrypt[1073]$Looks good.
14.3 SSL Labs to check installation
You can usewww.ssllabs.com to check your letsencrypt installation:
This failed for me. I believe it is because my certbot –apache gave me the option of creating a cert for www.zintis.net which I took. However, my apache2 setup seems to only have zintis.net (no www).
- fix by recreating a cert for zintis.net?
- fix by getting apache to use www.zintis.net?
- The domain name is an alias for a web site whose main name is different, but the alias was not included in the certificate by mistake
I am not sure which way to go…. hmmmmm
I will try 1) and include an alias 3) so, I will delete my certbot
certificate by running certbot --apache again, and replace it.
I am getting this:
root@zinux /var/www/html[1085]$
certbot --apache
Saving debug log to /var/log/letsencrypt/letsencrypt.log
Plugins selected: Authenticator apache, Installer apache

Which names would you like to activate HTTPS for?
- - - - - - - - - - - - - - - - - - - - - - - - - - - - - - - - - - - - - - - -
1: www.zintis.net
2: zinux.zintis.net
- - - - - - - - - - - - - - - - - - - - - - - - - - - - - - - - - - - - - - - -
Select the appropriate numbers separated by commas and/or spaces, or leave input
blank to select all options shown (Enter 'c' to cancel): c
Please specify --domains, or --installer that will help in domain names autodiscovery, or --cert-name for an existing certificate name.
root@zinux /var/www/html[1086]$
certbot --apache --domains zintis.net
Saving debug log to /var/log/letsencrypt/letsencrypt.log
Plugins selected: Authenticator apache, Installer apache
Requesting a certificate for zintis.net
Performing the following challenges:
http-01 challenge for zintis.net
Waiting for verification...
Cleaning up challenges

We were unable to find a vhost with a ServerName or Address of zintis.net.
Which virtual host would you like to choose?
- - - - - - - - - - - - - - - - - - - - - - - - - - - - - - - - - - - - - - - -
1: wordpress-le-ssl.conf          | Multiple Names        | HTTPS | Enabled
2: wordpress.conf                 | Multiple Names        |       | Enabled
3: ssl.conf                       |                       | HTTPS | Enabled
- - - - - - - - - - - - - - - - - - - - - - - - - - - - - - - - - - - - - - - -
Select the appropriate number [1-3] then [enter] (press 'c' to cancel): c
No vhost exists with servername or alias of zintis.net. No vhost was selected. Please specify ServerName or ServerAlias in the Apache config.
No vhost selected

IMPORTANT NOTES:
 - Unable to install the certificate
 - Congratulations! Your certificate and chain have been saved at:
   /etc/letsencrypt/live/zintis.net/fullchain.pem
   Your key file has been saved at:
   /etc/letsencrypt/live/zintis.net/privkey.pem
   Your certificate will expire on 2021-07-22. To obtain a new or
   tweaked version of this certificate in the future, simply run
   certbot again with the "certonly" option. To non-interactively
   renew *all* of your certificates, run "certbot renew"
root@zinux /var/www/html[1087]$
So, I then changed the apache httpd.conf file to specify my server correctly from www.zintis.net to just zintis.net. the restarted httpd, but still I got this:
root@zinux /etc/httpd/conf[1097]$
certbot --apache --domains zintis.net
Saving debug log to /var/log/letsencrypt/letsencrypt.log
Plugins selected: Authenticator apache, Installer apache
Cert not yet due for renewal

You have an existing certificate that has exactly the same domains or certificate name you requested and isn't close to expiry.
(ref: /etc/letsencrypt/renewal/zintis.net.conf)

What would you like to do?
- - - - - - - - - - - - - - - - - - - - - - - - - - - - - - - - - - - - - - - -
1: Attempt to reinstall this existing certificate
2: Renew & replace the certificate (may be subject to CA rate limits)
- - - - - - - - - - - - - - - - - - - - - - - - - - - - - - - - - - - - - - - -
Select the appropriate number [1-2] then [enter] (press 'c' to cancel): 2
Renewing an existing certificate for zintis.net

We were unable to find a vhost with a ServerName or Address of zintis.net.
Which virtual host would you like to choose?
- - - - - - - - - - - - - - - - - - - - - - - - - - - - - - - - - - - - - - - -
1: wordpress-le-ssl.conf          | Multiple Names        | HTTPS | Enabled
2: wordpress.conf                 | Multiple Names        |       | Enabled
3: ssl.conf                       |                       | HTTPS | Enabled
- - - - - - - - - - - - - - - - - - - - - - - - - - - - - - - - - - - - - - - -
Select the appropriate number [1-3] then [enter] (press 'c' to cancel): c
No vhost exists with servername or alias of zintis.net. No vhost was selected. Please specify ServerName or ServerAlias in the Apache config.
No vhost selected

IMPORTANT NOTES:
 - Unable to install the certificate
 - Congratulations! Your certificate and chain have been saved at:
   /etc/letsencrypt/live/zintis.net/fullchain.pem
   Your key file has been saved at:
   /etc/letsencrypt/live/zintis.net/privkey.pem
   Your certificate will expire on 2021-07-22. To obtain a new or
   tweaked version of this certificate in the future, simply run
   certbot again with the "certonly" option. To non-interactively
   renew *all* of your certificates, run "certbot renew"
root@zinux /etc/httpd/conf[1098]$
But???? I checked to browse to zintis.net and now got a valid secure certificate?????
Lets check ssllab.com…
15 !%\(@#T^\) getting in trouble now:
trying to get my wordpress config, my apache config, my hostnamectl, my dns all to match zintis.net, but now letsencrypt.org giving me this grieve:
certbot --apache --domain zintis.net
Saving debug log to /var/log/letsencrypt/letsencrypt.log
Plugins selected: Authenticator apache, Installer apache
Cert not yet due for renewal

You have an existing certificate that has exactly the same domains or certificate name you requested and isn't close to expiry.
(ref: /etc/letsencrypt/renewal/zintis.net.conf)

What would you like to do?
- - - - - - - - - - - - - - - - - - - - - - - - - - - - - - - - - - - - - - - -
1: Attempt to reinstall this existing certificate
2: Renew & replace the certificate (may be subject to CA rate limits)
- - - - - - - - - - - - - - - - - - - - - - - - - - - - - - - - - - - - - - - -
Select the appropriate number [1-2] then [enter] (press 'c' to cancel): 2
Renewing an existing certificate for zintis.net
An unexpected error occurred:
There were too many requests of a given type :: Error creating new order :: too many certificates already issued for exact set of domains: zintis.net: see https://letsencrypt.org/docs/rate-limits/
Please see the logfiles in /var/log/letsencrypt for more details.
root@zintis /etc/httpd/conf.d[1019]$
15.1 Discussion on deleting certs
I found this discussion on community.letsencrypt.org that points out the tricky nature of getting your certs straightened out.
Seems that the best solution is let them expire (after 90 days).
Another, slightly later discussion has some better info: here
The user got his error:
 usage:
certbot [SUBCOMMAND] [options] [-d DOMAIN] [-d DOMAIN] ...

 Certbot can obtain and install HTTPS/TLS/SSL certificates.  By default,
 it will attempt to use a webserver both for obtaining and installing the
 certificate.
 certbot: error: unrecognized arguments:
16 Commercial Certificate from GoDaddy
I caved and bought the EV certificate from GoDaddy that expires in 2 years, (April 2023). That has yet to be applied to zintis.net, awaiting for confirmation.
17 Removing certificates from Apache config
From a 6 year old post:
The reason why the restart you mention fails is probably because you're
commenting out the certificate in a general config file and leave it in some
other file, probably in a vhost config. You could check for that with this: grep
-E '(domain[12]\.certificate|localhost\.crt) /etc/httpd/sites-enabled/*', which
will search for the strings: domain1.certificate, domain2.certificate and
localhost.crt in all files in /etc/httpd/sites-enabled/ directory. If it finds
either of these strings it will print out the relevant lines prepended with the
filename containing them. You can then proceed to comment out those lines. You
may have to change the certificate file path in order to provide another
certificate or comment out the whole HTTPS section if you only want plain HTTP.

Try to restart (or test configuration) after you're done. If you get through a
restart successfully, then the server has stopped using the certificates.
Another key bit of info on certs: "This file (localhost.crt) is generated with the script /etc/pki/tls/certs/make-dummy-cert on Red Hat, CentOS, and derivatives. You should not need it after you configure your web server to use the DigiCert certificate, but I wanted to add this to the conversation. – Aaron Copley Dec 2 '14 at 21:40 "
And more: You can regenerate the default self-signed certificate using OpenSSL:
openssl req -x509 -nodes -days 365 -newkey rsa:2048 -keyout /etc/pki/tls/private/localhost.key -out /etc/ssl/certs/localhost.crt
- You can search the Apache config files and replace the self-signed cert with the new certificate.
This command will tell you which Apache config files reference the localhost.crt file:
grep -i -r localhost.crt etc/httpd An example output of the above command might be this:
/etc/httpd/conf.d/ssl.conf:SSLCertificateFile /etc/pki/tls/certs/localhost.crt That tells us to look in /etc/httpd/conf.d/ssl.conf and update the SSLCertificateFile, SSLCertificateKeyFile, and SSLCertificateChainFile to their new DigiCert certificate files.
Please feel free to call DigiCert support at 1-801-701-9600 if you have any problems or questions.
From this lin:
The files /etc/pki/tls/certs/localhost.crt and /etc/pki/tls/private/localhost.key are created by the postinstall script of the mod_ssl package. You can find the CentOS 7 spec file here: https://git.centos.org/rpms/httpd/blob/c7/f/SPECS/httpd.spec (check the other branches for different CentOS versions). Here is the script from CentOS 7:

%define sslcert %{_sysconfdir}/pki/tls/certs/localhost.crt
%define sslkey %{_sysconfdir}/pki/tls/private/localhost.key

%post -n mod_ssl
umask 077

if [ -f %{sslkey} -o -f %{sslcert} ]; then
   exit 0
fi

%{_bindir}/openssl genrsa -rand /proc/apm:/proc/cpuinfo:/proc/dma:/proc/filesystems:/proc/interrupts:/proc/ioports:/proc/pci:/proc/rtc:/proc/uptime 2048 > %{sslkey} 2> /dev/null

FQDN=`hostname`
if [ "x${FQDN}" = "x" -o ${#FQDN} -gt 59 ]; then
   FQDN=localhost.localdomain
fi

cat << EOF | %{_bindir}/openssl req -new -key %{sslkey} \
         -x509 -sha256 -days 365 -set_serial $RANDOM -extensions v3_req \
         -out %{sslcert} 2>/dev/null
--
SomeState
SomeCity
SomeOrganization
SomeOrganizationalUnit
${FQDN}
root@${FQDN}
EOF
So if you delete both localhost.key and localhost.crt, and do yum reinstall mod_ssl, then the postinstall script will recreate them for you.

(I'm posting this answer because searching how to recreate /etc/pki/tls/certs/localhost.crt leads me here, but as others stated, if you got a cert signed by a CA, you don't need the localhost.crt and localhost.key files any more.)
More:
 just had this same problem. There was no default localhost certificate for CentOS 8 so I ran this and it regenerated all the default certs.

/usr/libexec/httpd-ssl-gencerts
Hope it helps someone else.